目次
- 公開鍵と秘密鍵の作成
- 公開鍵の設定
- 公開鍵認証でのSSH接続
公開鍵認証の設定
公開鍵認証を使用するようにサーバーを設定します。
rootアカウントでログインします。
[root@flex-000 ~]#
プロンプト表示に続けて次のコマンドを入力します。
[root@flex-000 ~]# vi /etc/ssh/sshd_config- ※ 「vi」と「/etc/ssh/sshd_config」の間はスペースが入ります。
入力したらキーボードの Enterキーを押します。
viエディタで[sshd_config]の内容が表示されます。
#StrictModes yes
#MaxAuthTries 6
#RSAAuthentication yes
#PubkeyAuthentication yes
#AuthorizedKeysFile .ssh/authorized_keys
# For this to work you will also need host keys in /etc/ssh/ssh_known_hosts
「#RSAAuthentication yes
#PubkeyAuthentication yes
#AuthorizedKeysFile .ssh/authorized_keys」
という記述を探します。キーボードの「i」キーを押し、viエディタを入力モードにすると内容を編集できます。
下記の通り編集します。#StrictModes yes
#MaxAuthTries 6
RSAAuthentication yes
PubkeyAuthentication yes
AuthorizedKeysFile .ssh/authorized_keys
# For this to work you will also need host keys in /etc/ssh/ssh_known_hosts
-- INSERT --
- 行頭の「#」を削除します。
「PasswordAuthentication yes」という記述を探します。
# To disable tunneled clear text passwords, change to no here!
#PasswordAuthentication yes
#PermitEmptyPasswords no
PasswordAuthentication yes
# Change to no to disable s/key passwords
#ChallengeResponseAuthentication yes
ChallengeResponseAuthentication no
# Kerberos options
-- INSERT --
下記の通り編集します。
# To disable tunneled clear text passwords, change to no here!
#PasswordAuthentication yes
#PermitEmptyPasswords no
PasswordAuthentication no
# Change to no to disable s/key passwords
#ChallengeResponseAuthentication yes
ChallengeResponseAuthentication no
# Kerberos options
-- INSERT --
- yes の部分を no に書き換えます。
「UsePAM yes」という記述を探します。
# Depending on your PAM configuration, this may bypass the setting of
# PasswordAuthentication, PermitEmptyPasswords, and
# "PermitRootLogin without-password". If you just want the PAM account and
# session checks to run without PAM authentication, then enable this but set
# ChallengeResponseAuthentication=no
#UsePAM no
UsePAM yes
# Accept locale-related environment variables
-- INSERT --
下記の通り編集します。
# Depending on your PAM configuration, this may bypass the setting of
# PasswordAuthentication, PermitEmptyPasswords, and
# "PermitRootLogin without-password". If you just want the PAM account and
# session checks to run without PAM authentication, then enable this but set
# ChallengeResponseAuthentication=no
#UsePAM no
UsePAM no
# Accept locale-related environment variables
-- INSERT --
- yes の部分を no に書き換えます。
編集が完了したら、キーボードの Escキーを押し、viエディタをコマンドモードに戻します。
編集内容を保存するため、次のコマンドを入力します。
:w
入力したらキーボードの Enterキーを押します。
viエディタを終了するため、次のコマンドを入力します。
:q
入力したらキーボードの Enterキーを押します。
- 設定ファイルの編集内容を反映させるため、sshdを再起動します。
プロンプト表示に続けて次のコマンドを入力します。[root@flex-000 ~]# vi /etc/ssh/sshd_config
[root@flex-000 ~]# /etc/rc.d/init.d/sshd restart- ※ 「/etc/rc.d/init.d/sshd」と「restart」の間はスペースが入ります。
入力したらキーボードの Enterキーを押します。
sshdの再起動が完了すると、下記のように表示されます。
[root@flex-000 ~]# vi /etc/ssh/sshd_config
[root@flex-000 ~]# /etc/rc.d/init.d/sshd restart
sshd を停止中: [ OK ]
sshd を起動中: [ OK ]
[root@flex-000 ~]#
「sshd を起動中: [OK]」と表示されれば、正しく再起動できています。
rootアカウントから、SSHでのログインを許可しているユーザーアカウントに切り替えます。
[root@flex-000 ~]# su - admin
[admin@flex-000 ~]$- ※ このマニュアルでは、例として「admin」というユーザーアカウントに切り替えます。
公開鍵の格納ディレクトリを作成します。
プロンプト表示に続けて次のコマンドを入力します。[admin@flex-000 ~]$ mkdir ~/.ssh- ※ 「mkdir」と「~/.ssh」の間はスペースが入ります。
入力したらキーボードの Enterキーを押します。
/home/admin/.ssh ディレクトリが作成されます。公開鍵の格納ディレクトリのパーミッションを「700」に変更します。
プロンプト表示に続けて次のコマンドを入力します。[admin@flex-000 ~]$ chmod 700 ~/.ssh- ※ 「chmod」と「700」と「~/.ssh」の間はスペースが入ります。
入力したらキーボードの Enterキーを押します。
公開鍵のファイル[authorized_keys]を作成します。
プロンプト表示に続けて次のコマンドを入力します。[admin@flex-000 ~]$ vi ~/.ssh/authorized_keys- ※ 「vi」と「~/.ssh/authorized_keys」の間はスペースが入ります。
入力したらキーボードの Enterキーを押します。
viエディタで[authorized_keys]が開きます。
~
~
~
~
~
"~/.ssh/authorized_keys" [新ファイル] 0,0-1 全て
キーボードの「i」キーを押し、viエディタを入力モードにします。
「公開鍵と秘密鍵の作成」で保存した「id_rsa.pub」(公開鍵)をテキストエディタで開きます。
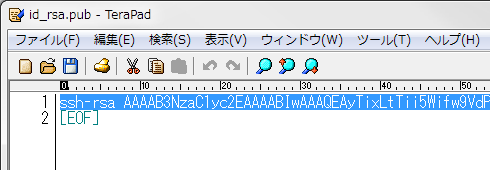
内容をコピーします。コピーした内容を[authorized_keys]に貼り付けます。
ssh-rsa AAAAB3NzaC1yc2EAAAABIpAAAQEAwTpC4D/nyH0q5gzlNCOxcxFmy/sklML7yeEn7dVNsi5f
TNFrbeSU7Fj3O9zwumTJFS0NpbK2YUPfA7Uh/Rp2oby8tmRpD24TnGb4xDSiminVzUgh25CRa3gmwuOh
b8kpFUCWm101m4hvq406ev98qvBeLocZgw/0uzRL39ugFFmj/qe6aFTdM4xHJXpIVT/iVc/4BtVH0EQr
q4/T+c/n9nrpQ9FpdHuy8MU8FUJ3nWoflefRIklu0+ccCmh7kIVPd05jQJt9KD1FpzrsTo+lePVElft7
FFqrF0iBrXpy62Em+0mP3FPBwq8N3MvP1zafpQP+jneaWq3ppY7rJvvGaw== kagoya@kagoya
~
~
~
~
~
~
~
-- 挿入 -- 2,1 全て
キーボードの shiftキー + insertキーを押すと、クリップボードの内容を貼り付けできます。
貼り付けが完了したら、キーボードの Escキーを押し、viエディタをコマンドモードに戻します。編集内容を保存するため、次のコマンドを入力します。
~
~
:w
入力したらキーボードの Enterキーを押します。
viエディタを終了するため、次のコマンドを入力します。
~
~
:q
入力したらキーボードの Enterキーを押します。
[authorized_keys]のパーミッションを「600」に変更します。
プロンプト表示に続けて次のコマンドを入力します。[admin@flex-000 ~]$ chmod 600 ~/.ssh/authorized_keys- ※ 「chmod」と「600」と「~/.ssh/authorized_keys」の間はスペースが入ります。
入力したらキーボードの Enterキーを押します。
目次
- 公開鍵と秘密鍵の作成
- 公開鍵の設定
- 公開鍵認証でのSSH接続